Your gauge makes the decision
- Find your vehicle’s recommended pressure, then check each tire with a calibrated gauge.
- Use the station hose to add air in short bursts, checking the pressure between bursts.
- If you’ve arrived with warm tires, use the warm-tire guidance below and finish with a cold check.
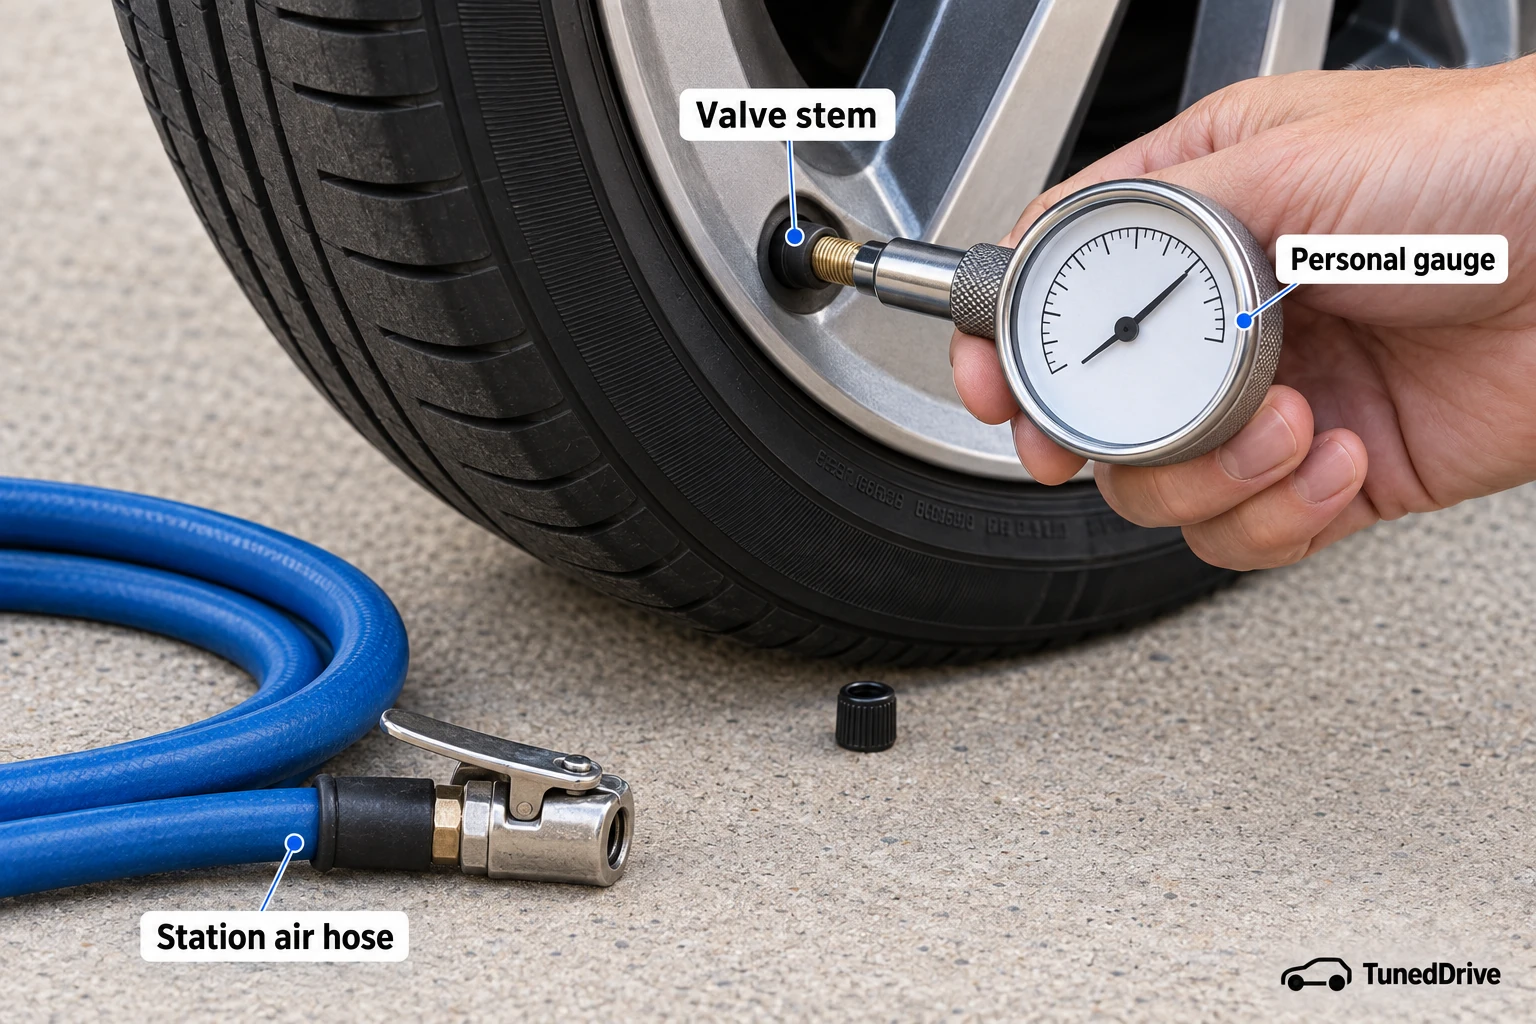
Standing beside a pump with its own pressure display, you still have a reason to reach for your own gauge. We’d use the station as the air supply and a calibrated personal gauge for the readings, because station gauges can be poorly calibrated and give inconsistent results.
A dial or digital gauge from an auto parts store gives you a way to check before inflation and confirm the result afterward. Michelin’s station-gauge advice (opens in a new tab) specifically recommends this approach for precise pressure adjustment. If you need help checking the pressure, have a professional check it.
Find the number for your vehicle
Look for a pressure sticker on the driver’s door pillar or the back of the fuel filler flap. You can also find the recommendation in your vehicle’s user guide, generally kept in the glove compartment. These are the usual locations identified in Michelin’s pressure guidance (opens in a new tab).
Don’t use the tire sidewall as the source of your recommended pressure. Your target comes from the vehicle manufacturer, so have that recommendation in front of you before deciding whether to add or release air.
The inflator’s gauge displays pressure in bars or PSI. Compare your measured pressure with the vehicle recommendation: a lower cold reading calls for more air, while a higher cold reading calls for releasing some. The warm-tire branch below changes how you handle that comparison after driving.
Let the tires cool before the final adjustment
For a stationary check, letting the car rest for at least three hours fits all the waiting periods below. That gives you a practical starting point when you can check before driving, because heat raises tire pressure and changes the reading you’re comparing with the cold recommendation.
As a limited Nissan checking example, Nissan’s tire guidance (opens in a new tab) defines cold tires as resting for at least three hours or having been driven less than one mile. It calls for a good-quality gauge, checking the spare, and measuring instead of judging by appearance: a tire can look fine while underinflated.
Chevrolet’s checking guidance (opens in a new tab) uses at least three hours without driving or no more than one mile. That mileage wording differs slightly from Nissan’s less-than-one-mile condition, so keep each brand’s wording with its own guidance.
Michelin’s cold-check guidance (opens in a new tab) says the car should have been unused for two hours or traveled less than two miles at low speed. Its additional checking instructions say before driving or at least two to three hours afterward. A three-hour stationary wait covers both stated waiting periods without choosing between those mileage allowances.
Take a reading before adding air
While you’re beside each tire, look for objects wedged in the tread. Chevrolet’s checking advice (opens in a new tab) explains that these can work farther into the tire and cause air loss. This is an observation to make alongside the pressure check.
To take the reading, remove the valve cap and press your gauge firmly onto the valve stem. Read the pressure, then compare it with the vehicle’s recommendation. That measurement tells you whether this tire needs adjustment before you connect the station’s air supply.
If you hear a hiss while connecting the inflator, Michelin describes it as air escaping from the tire and says it shouldn’t seriously affect pressure. Use the gauge reading to judge the pressure, keeping the sound separate from the number you’re trying to reach.
If you’ve already driven to the station
If the pressure is below the vehicle recommendation even with the tires warm, add air. Driving heats the air inside and raises pressure, so a clearly low warm reading still calls for a top-up. Filling a warm tire only to the cold recommendation leaves it underinflated once it cools.
Michelin’s warm-tire instruction (opens in a new tab) is to add 0.3 bar (4.35 PSI) to the vehicle manufacturer’s recommended pressure, then check and readjust when cold. That addition is to the recommended target, not an instruction to increase whatever reading you currently have by 4.35 PSI.
Michelin also cautions against using a warm reading as the baseline for precise adjustment. Keep the two parts together: the warm top-up addresses the low reading now, and the later cold check establishes the final pressure.
Connect the hose and fill in short bursts
Most tires can use compressed air or nitrogen, provided you follow the car manufacturer’s pressure recommendation. Michelin’s air-and-nitrogen guidance (opens in a new tab) permits mixing them when adding pressure, so most nitrogen-filled tires can be topped up with the station’s ordinary air.
Use the pressure target carefully. Underinflated tires generate excessive heat when driven, which can weaken them to failure, and rapid deflation at high speed can cause loss of control. Overinflation causes a harsher ride and uneven wear. Incorrect pressure also affects safety, premature wear and fuel consumption, with the manufacturers’ warnings including hazardous handling, overheating and a tire bursting or blowing out.
- Connect the station inflator’s mouthpiece to the tire valve. Read the pressure shown on its gauge.
- If the tire needs air, add a short burst, then check with your calibrated gauge. Compare the new reading with the applicable target.
- Continue with short bursts and checks until the gauge reaches that target. Stop adding air when the reading is right.
When the reading is too high
For a reading that’s too high when the tire is cold, press the small pin in the center of the valve stem to release air. Recheck after the adjustment and bring the pressure to the vehicle recommendation. This cold-tire condition applies to Michelin’s release-air procedure (opens in a new tab).
If you set the cold pressure correctly and later see a higher reading after driving, allow the tire to cool and check again. Michelin explains that the reading returns to the correct level as the air cools, so that heat-related increase doesn’t call for bleeding air.
Confirm the result and replace the caps
After the adjustment, confirm the pressure with your calibrated gauge. A cold reading at the vehicle’s recommendation completes the pressure adjustment for that tire. If you used the warm-tire branch, keep its later cold check as the remaining step.
Replace the valve cap when you’re done. Use good-quality caps: they help keep dust from clogging the valves and help maintain their seal. Michelin’s valve-cap guidance (opens in a new tab) makes the cap part of finishing the job, so leave each checked valve capped.
More in this category